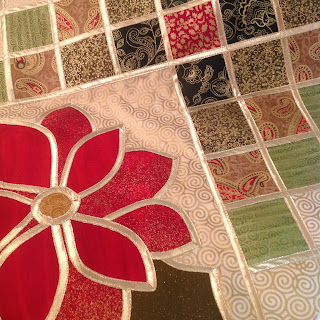
The pattern is available from bear paw productions as a kit. I didn't use a kit, but chose my own fabrics. Luckily my far too big box of spare fabrics contained plenty of glittery and gold fabrics, and I only needed to buy two fat quarters. The gold leading is clover fusible bias binding, and you need two rolls, so this is not a cheap project to make. Since I'd never tried this technique before I made two extra poinsettia blocks to practice, which needed another roll of gold- oof!
I don't know what method is recommended in the original pattern from Bear Paw. The method I used was not difficult, but very time consuming. The whole thing from start to finish took me about 25 hours. Although I love it, I will certainly think twice before making another!
First you trace the whole pattern onto a backing sheet. Then cut strips from your fabrics, which you back with bondaweb, then cut the strips into squares, and trim. Iron the squares onto the backing sheet. I love how you can take some lightly meh fabrics, cut them up, mix them up, and ooh!
The poinsettias are made like ordinary applique, by tracing onto bondaweb, then fixing into place. After everything is bonded into place, you apply the gold leading. I was lucky to be able to borrow a mini-iron during my classes, which I'm sure made it much easier to apply the leading around the tricky curves.
Next, you need to sew down both edges of the leading. This process totally transforms the texture of the leading, somehow making it less shiny and more sparkly!
My most hated job is hiding and tying all those ends!
After the poinsettias are finished, sew the poinsettia blocks to the ends of the table runner, and apply the leading grid before sewing. Even though these are easy straight lines, there are a lot of them, and I went quite slowly as I was trying very hard to be precise.
Finally you need to back and bind the runner. Frustratingly I didn't have enough of the fabric I liked for backing and binding in one, so I had to do them separately, but finally the runner is finished!
I really, really like this. It is just so bling and Christmassy!


